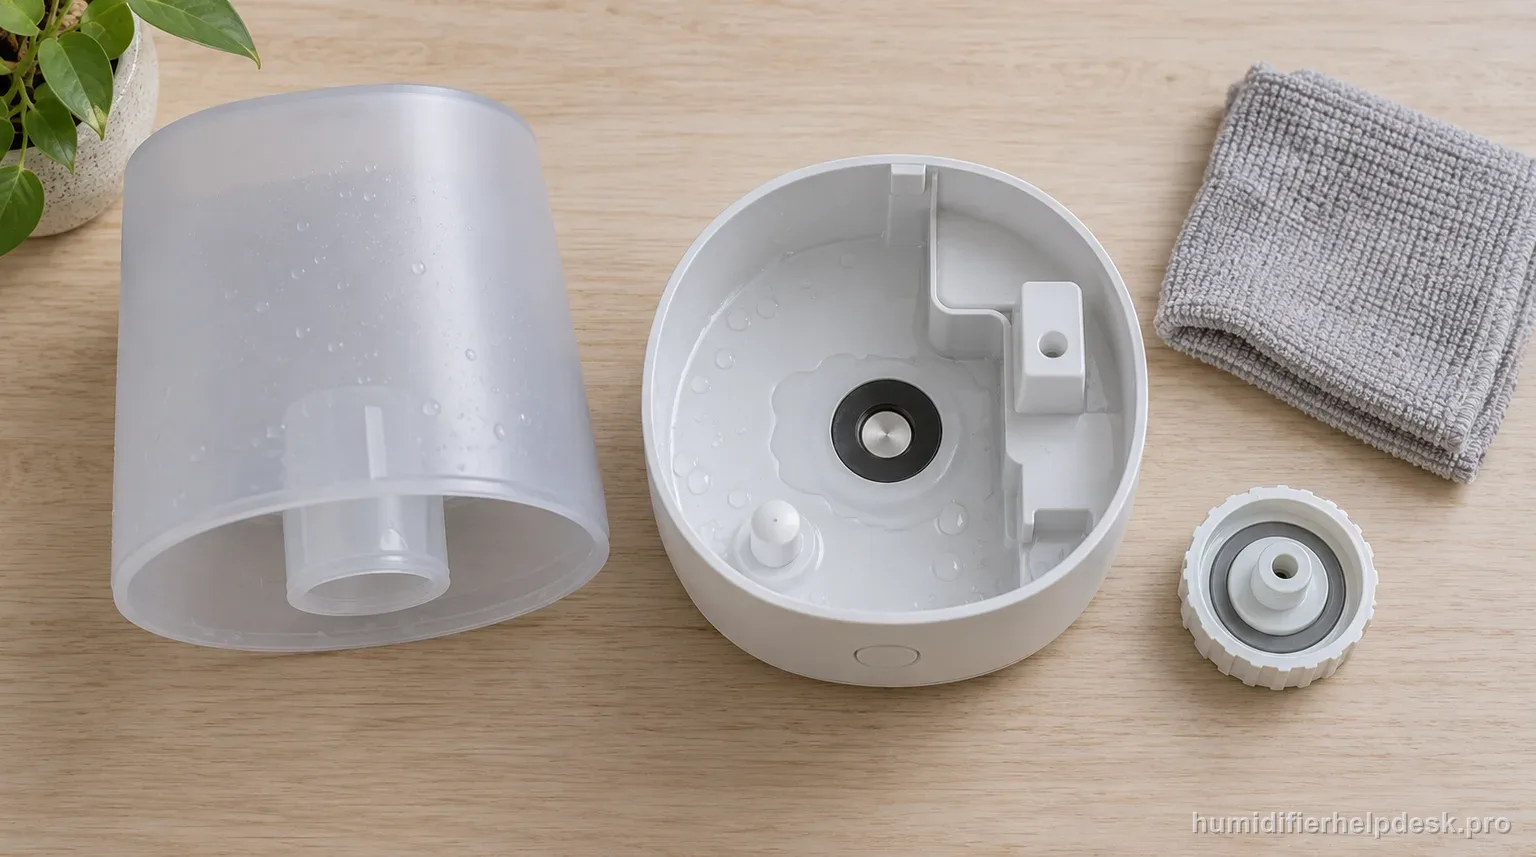
The VUL575 manual gives only three causes for reservoir overflow: a damaged tank, a Tank Cap that is not tight, or a missing Tank Cap Seal. Complete those three checks before assuming the powered base has failed.
Does this match what you are seeing?
Owners describe this Vicks VUL575 SweetDreams problem in a few different ways. If one of these sounds like yours, this guide covers it:
- Leaking water
- Water under the base
- Humidifier leaking from bottom
- Reservoir leaking or overflowing
Check these in order
- Turn the VUL575 off, unplug it, and dry the reservoir and surrounding surface before tracing fresh water.
- Inspect the tank closely for cracks, impact damage, or a repeatable seep.
- Remove and reinstall the Tank Cap, turning it fully to the lock position.
- Confirm the Tank Cap Seal is attached to the cap and seated normally.
- Retest only on a firm, flat, waterproof surface with the cord and controls kept dry.
Diagnostic decision path
Water overflowing from the VUL575 reservoir has a deliberately short troubleshooting path. The official Vicks table lists only three causes: the Water Tank may be damaged, the Tank Cap may not be tight, or the Tank Cap Seal may be missing. That means room humidity, mist intensity, nebulizer scale, and wall placement belong to other symptoms, not to the reservoir-overflow diagnosis. Starting with the exact three-part water-containment path avoids unnecessary cleaning or disassembly.
- Turn the humidifier off, unplug it, remove standing spill water, and dry the tank exterior, reservoir rim, base exterior, and table before looking for a fresh leak.
- Keep the unit on a firm, level, waterproof surface during the retest and keep water away from the plug, cord, and controls.
- Do not attempt to open the base or tamper with the power knob. The VUL575 manual explicitly places those actions outside normal owner service.
If: A crack or damaged area is visible in the Water Tank
What it means: The water container cannot hold pressure/volume as designed and Vicks lists tank damage as an overflow cause.
Do next: Stop using that tank and replace it through the proper parts/support route rather than continuing to refill a cracked vessel.
If: The Tank Cap is not fully in the lock position
What it means: The outlet path may not seal or meter water correctly.
Do next: Remove and reinstall the cap, turn it fully to the lock position, dry old water, and perform one controlled refill test.
If: The Tank Cap Seal is missing or displaced
What it means: The cap assembly lacks the seal Vicks expects in the reservoir-overflow path.
Do next: Do not improvise a random gasket. Contact Vicks Consumer Relations for the appropriate part or replacement route.
If: All three checks are correct but the reservoir still overflows
What it means: The three external causes named by Vicks have all been ruled out.
Do next: Keep the VUL575 unplugged and contact Consumer Relations instead of opening the base or modifying the water valve.
If: There is no reservoir overflow, only damp windows or walls
What it means: The symptom better matches condensation from excessive output or placement.
Do next: Use the condensation path and adjust mist intensity/placement rather than replacing the tank cap or seal.
How to interpret the retest
The overflow row is one of the cleanest examples of why exact-model troubleshooting matters: Vicks does not tell the owner to descale the nebulizer, lower mist output, or change room humidity for reservoir overflow. Those belong to other rows.
A dry-surface reset prevents old water from biasing the diagnosis. The important evidence is where the first new water appears after the tank is refilled and seated, not where the largest old puddle collected.
The Tank Cap Seal is a model-specific sealing component. A generic O-ring may look similar but can have the wrong thickness or compression behavior, so an improvised substitute can create a larger leak above the powered base.
If tank damage is visible, repeated tests do not add useful evidence. Replace the damaged water-bearing part and keep the electrical base dry.
Condensation and overflow can happen in the same room, but they need separate fixes. Overflow produces water through the tank/reservoir path; condensation forms on room surfaces when moisture output exceeds what the space can absorb.
Model-specific context that changes the diagnosis
Photograph the cap and seal before reassembly
A quick photo can help confirm whether the seal was present and how it sat when the problem occurred. This is especially useful if you need to describe the failure to Consumer Relations without repeatedly wet-testing the unit.
One controlled refill is enough after each correction
After tightening the cap or confirming the seal, dry everything and run one deliberate test. Repeated uncontrolled refills can spread water into electrical areas without providing better diagnostic information.
Do not confuse overflow with a wet room
If the tank/reservoir stays stable but windows and walls are damp, the water containment path is probably not the problem. Lower output and adjust placement using the separate Vicks condensation guidance.
Common mistakes that make this harder to diagnose
- Trying to solve reservoir overflow by lowering the mist setting instead of checking tank, cap, and seal.
- Replacing or cleaning the nebulizer even though the overflow row does not implicate it.
- Using a generic gasket when the Tank Cap Seal is missing.
- Retesting repeatedly while old water is still pooled under the unit.
- Opening the base after the three documented external checks are complete.
The overflow problem is resolved when the reservoir remains stable through a dry, level retest after a correctable tank-cap issue is fixed. A damaged tank requires replacement, and a missing cap seal requires the proper replacement route. If the tank is intact, the cap is locked, and the seal is present yet overflow returns, the owner-level checklist is complete; keep the VUL575 unplugged and contact Vicks.
Questions people ask about this exact symptom
Why is water overflowing from my Vicks VUL575 reservoir?
Vicks lists three causes: the Water Tank may be damaged, the Tank Cap may not be tight, or the Tank Cap Seal may be missing. Unplug and dry the unit, inspect the tank, lock the cap fully, and confirm the seal is attached. If all three are correct and overflow returns, contact Consumer Relations instead of opening the base.
Can I use a generic gasket if the VUL575 Tank Cap Seal is missing?
The manual tells you to confirm that the Tank Cap Seal is attached and to contact Consumer Relations if it is missing. A generic gasket may not match the original thickness or fit, so it can change the water-release behavior above the powered base. Keep the humidifier out of service until the correct seal or replacement cap is available.
How can I tell VUL575 overflow from condensation?
Dry the tank, reservoir, base exterior, and nearby surfaces first. Overflow returns through the tank/reservoir path and should be checked against tank damage, cap lock, and the cap seal. Condensation appears on room surfaces and is tied in the Vicks manual to excessive mist intensity or placement too close to walls/windows. Use the symptom that matches where fresh water appears.
Why this path is model-specific
The official VUL575 troubleshooting table maps reservoir overflow to a damaged tank, a Tank Cap that is not tight, or a missing Tank Cap Seal, and directs the user to replace damaged parts or contact Consumer Relations for a missing seal.
For the Vicks VUL575 SweetDreams, the machine type matters: it is ultrasonic. Visible mist is part of normal output when mist production is active, so a true no-mist complaint deserves model-specific troubleshooting.
Compare this symptom across verified models
If you are still deciding whether this behavior is normal or model-specific, use the symptom hub to compare only manufacturer-linked guides. Keep the Vicks VUL575 SweetDreams instructions above as the controlling path for this machine.
If the problem is still there
If the checks above do not change the symptom, use the manufacturer support path for this exact model. We intentionally stop before undocumented resets, sensor bypasses, internal mains work, or parts replacement that the consumer manual does not authorize.
What we do not recommend
Do not defeat a float, water-level sensor, overheat protection, interlock, or other safety feature. Do not open mains-powered sections for live testing. If the unit smells burned, becomes abnormally hot, smokes, sparks, has water near electrical parts, or repeatedly trips a circuit, stop using it and keep clear. Unplug it only if the plug, outlet, and surrounding area are dry and safe to reach; otherwise do not touch wet equipment and contact manufacturer support for next steps.
Primary source for this diagnosis
Source checked during the September 4, 2026 editorial review. Manufacturer documents can change; a material re-review updates this guide’s reviewed date rather than stamping unrelated pages.